How To Make A Beautiful Decoupage Painted Pumpkin
Pumpkin decor always brings so much joy to our homes. We can start decorating with it from late September all the way past Thanksgiving.
If you love decorating with pumpkins you are going to love how easy and beautiful this decoupage painted pumpkin decor is to make.

You start with your favorite shaped standard orange pumpkin. I wanted a taller more narrow one as I wanted my green leaves to cascade down the sides. Of course, you can decide which style you like best.
Decoupage Painted Pumpkin Instructions
One of my favorite mineral paints is by a company called Fusion Mineral Paints. I just adore the level of quality and the array of colors you get.
Check out how I was able to transform my dark and dingy end table using Fusion paints. You will be stunned at the transformation!
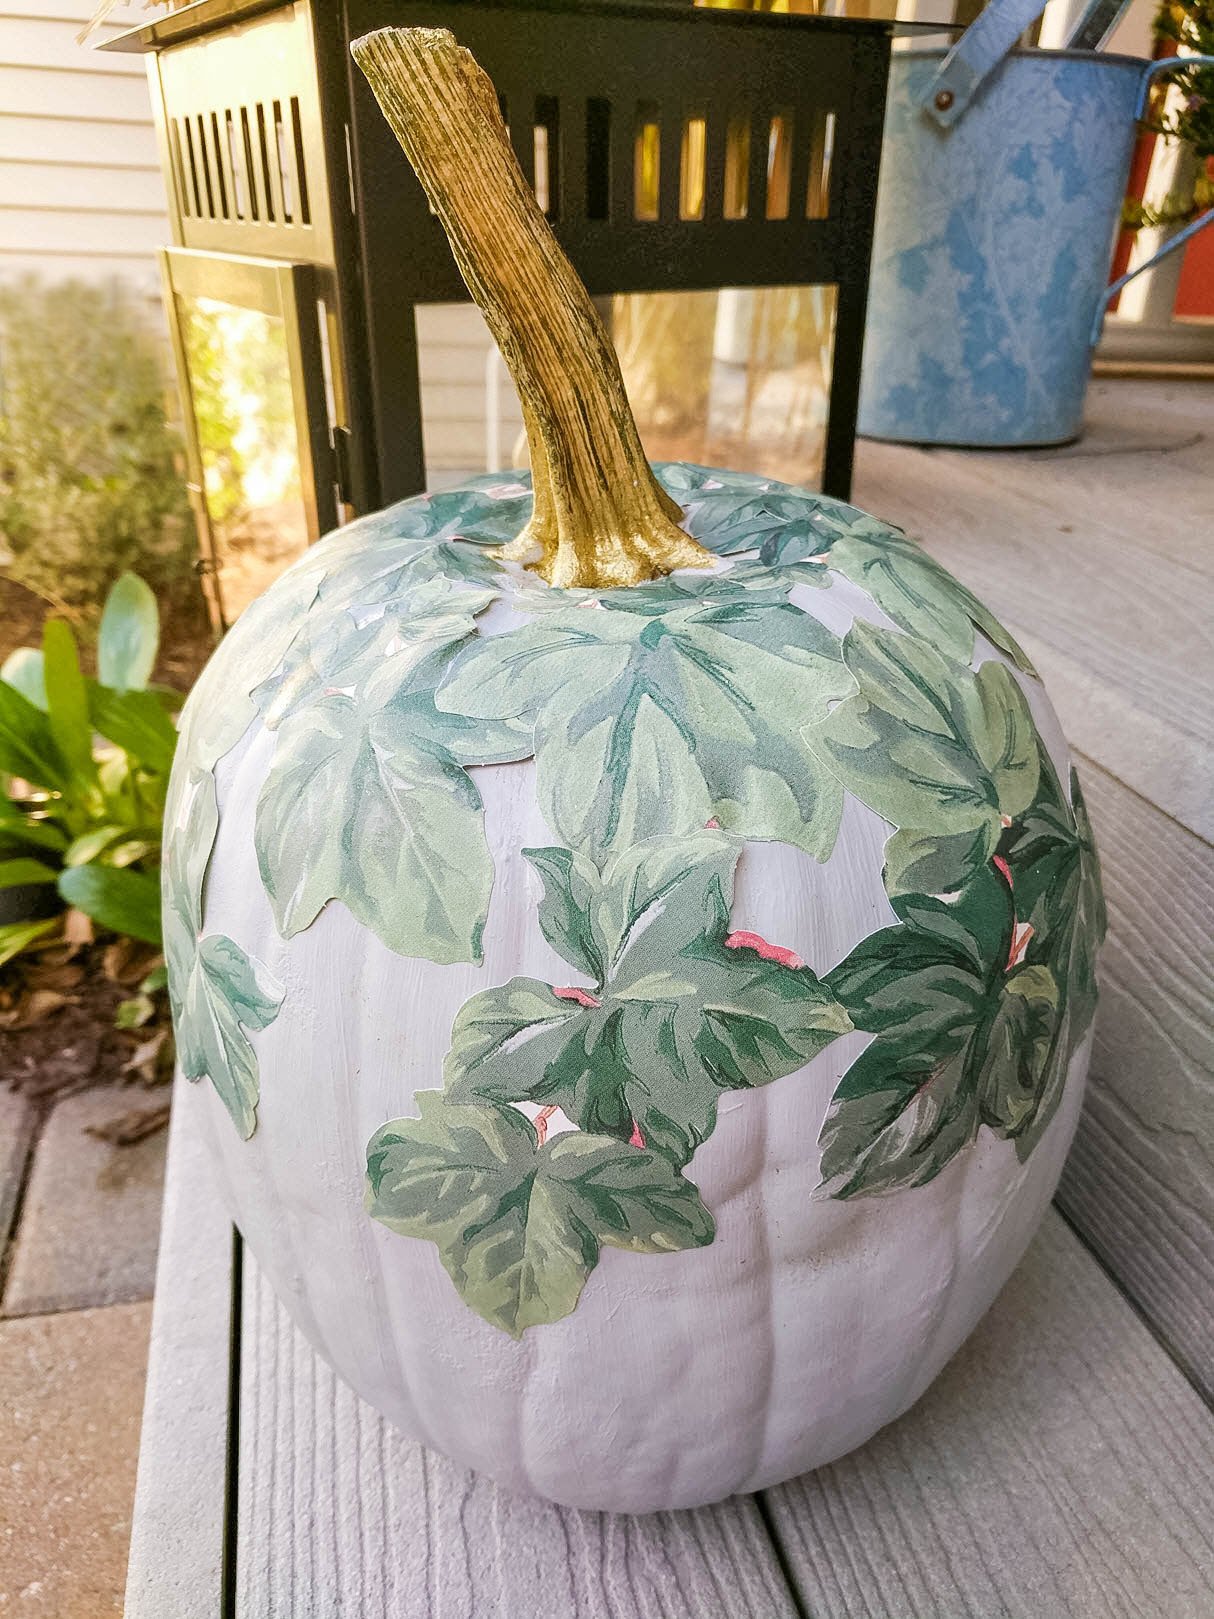
I decided to paint the pumpkin stem gold – I wanted to add a pop of panache to it and I think it worked out perfectly!
I used Gilding Wax in gold for the stem. I can’t even begin to tell you how easy it is to use. And wow, the finished results are simply stunning!

I used a color called Pebble – I just love this shade. It casts a beautiful greyish wispy green and is the perfect color for this project. Find some leaves you can use for the decoupage – I used these RoomMates Evergreen Ivy Peel & Stick Wall Decals.
I like them because they are much thicker and durable and so much easier to use for decoupage. There’s also a brand called Wallies Wallpaper Cutouts that I love to use just as much. Of course, any leave designs will work.

Be sure to use at least two coats of paint on your pumpkin and let it dry well before using the decals.
I used ModPodge to glue my decals onto the pumpkin. It works great for this craft and is super easy to do. Every crafter loves it and uses it for so many projects.
Once I painted the decals and adhered them to the pumpkin, I took a damp rag and patted it to ensure it would lay flat without bumps or wrinkles.

If you notice any areas where the decals are popping up, just take a damp rag and blot them back down. It works great and the pumpkin will stay in beautiful condition for months.

Try and place the leaves close to the top of the pumpkin stem – it creates a look of cascading leaves when you start draping them down the pumpkin.

Let the decals dry for about an hour and you are done!

This beautiful decoupage painted pumpkin will add so much Fall charm to your home – whether you use it inside or outside, it’s simply perfect!

I love creating beautiful pumpkin Fall decor. If you do too, you will want to check out my other pumpkin decor too!
I created some nail polished dipped pumpkins that everyone is flipping over!
And I made just for you – some beautiful Fall Decor Printables too – so be sure to head on over and download them too!


The fun thing about decorating pumpkins is you can be as creative as you want! There are so many colors and decals you can use.
I happen to love the various shades of green and this year pink and green pumpkins are all the rage!

When it comes to decoupage painted pumpkins – there are no rules so have fun!
For your convenience, this post contains affiliate links which means, if you click through and make a purchase, I may receive a small commission, at no additional cost to you. Thank you for supporting my blog!


Let me know if you have any questions about this decoupage painted pumpkin below in the comments.
We earn a commission for products purchased through some links in this article. As an Amazon.com Services LLC Associate, we earn a commission from any qualifying purchases at no cost to you.
And as always, thanks so much for stopping by! If you like this post, How To Make A Beautiful Decoupage Painted Pumpkin, subscribe via email below and never miss a post again!


That looks stunning Carolann. I absolutely love the rich luxurious contrast between the gold stem and the pale pastel leaves that seem to be tumbling down the sides of the pumpkin. Beautifully done
Carolann that is absolutely gorgeous! That lovely green decals really make the pumpkin stand out.
Thank you, Michelle! It was much fun making it. I just love Fall decor and painted pumpkins are so beautiful!
Carolann
Thanks much, Mary, I had much fun creating it. I just love Fall decor and painted pumpkins are so pretty.
Carolann
This pumpkin is so cute and really well done. I adore the gold stem it looks gilded and that you added the leaves just to the top of the pumpkin make it stand out.
Hi Leanna! So good hearing from you! I had much fun creating that pumpkin. I love the gold stem too. I hope you are having a great weekend!
Carolann xo
So cool your pumpkins are so fab! So creative and great job!
Thanks much, Patti. I just love this pumpkin. It was much fun to make.
Carolann xo
Pumpkins have never enjoyed such beauty. I think you are a trendsetter. I cannot express how cool I think this idea to decoupage pumpkins is.
Thanks much Sue, I love that pumpkin. It’s still in good shape too! It was much fun creating it.
Carolann
It’s been forever since I decoupaged! Thanks for reminding me what fantastic things you can do with it. Your pumpkin is lovely and so transitional for several seasons.
I agree with Lynn & same here, I have not decoupaged in ages! The pumpkin is so pretty and this is such a fun project!
What a great idea! Super fun to make I’m sure! Love how you made the stem gold!!
Wow! This is so beautiful! I thought for sure you had hand-painted it! So original too! Now I want to make one–thanks for the great idea!
xoxo Jodie & Julie
Wow, the pumpkin came out awesome!! such a clever idea!! so fun to do the blog hop with you!
That pumpkin turned out great! Perfect for Thanksgiving!
Carolann, your pumpkin looks great! Love that gold stem.
Thanks much, Lynn. I had much fun making it. Happy Thanksgiving to you and yours!
Carolann
Hi Katrin, Thank you! I had much fun making it. Happy Thanksgiving to you and yours!
Carolann
Hi Sam, Thank you! I had much fun making it. Happy Thanksgiving to you and yours!
Carolann
Hi ladies! Thank you! I had much fun making it. Happy Thanksgiving to you and yours!
Carolann
Hi Kellie, Thank you! I had much fun making it. Happy Thanksgiving to you and yours!
Carolann
Hi Sara, Thank you! I had much fun making it. Happy Thanksgiving to you and yours!
Carolann
Hi Tara, Thank you! I had much fun making it. Happy Thanksgiving to you and yours!
Carolann
Love this beautiful pumpkin! The gold stem is awesome!
Thanks Michelle, I had fun making it. Happy Thanksgiving to you and yours!
Carolann