How To Easily Transform Old Floor Vents To Brand New
Are your floor vents old, worn, and rusty? Well, if so, there’s never been an easier way to transform them back to brand new! I’ve been on a mission the past month to repair all the “little things” that drive me mad – like the rusty floor vents that magically appeared one day when I wasn’t looking.
The before and after is astounding!

You know, the one day you decided to really take a good long look at them and you noticed your once brand new floor vents literally look worn and aged. Yep, those. Well, since I like to do things the easy way, I knew I had a brilliant fix for restoring them back to brand new – better than brand new because now, I can choose a color I actually like!
My rusty shower caddy (you must check that out) was the other maddening fix I tackled this month too and super excited it came out perfectly! Give a girl spray paint and watch her rule the world!
I am so pleased with the results, and I know you will be too.
Here’s what one of my bathroom floor vents looked like. Nasty – and not at all what it’s supposed to look like.

The bathroom vents were hit the hardest because of, obviously, water condensation and traffic. When I lifted it, I was even more shocked. I know I just cleaned under there! We had our vents blown out and cleaned not that long ago. Being a clean freak, this freaked me out!

OK, so let’s get to this easy fix! I started by choosing the best spray paint for this particular problem. After asking around, I was told to use this Rust-Oleum 249076 Painter’s Touch Multi-Purpose Spray Paint. I particularly like it because it has paint and primer in one.
I wanted a different color but not too different, and this color worked out perfectly!

The backside of my floor vent was worse than the front so don’t forget to paint the backside too!

These are the steps I took to restore my floor vents to brand new:
1 – Clean vent with soapy water making sure you get in between all the air vents and moving parts.
2 – With a sanding block or sandpaper, gently sand away any loose paint and rust spots.

I like using the Pro Grade Precision 180 Grit X-Fine Block Sanding Sponge. I use it for all of my furniture restoration as well. You won’t need a higher grit than 180 as you don’t want to remove too much of the finish.

Now that the floor vent is nicely sanded and ready to go, the rest is easy peasy.

3 – Spray paint the backside first and let it dry well. Spray paint tends to dry quickly especially if you do it outdoors.
I did mine outdoors in good weather, and it was dry in under a half-hour.
4 – Once the back is good and dry, paint the front and don’t forget the sides too.

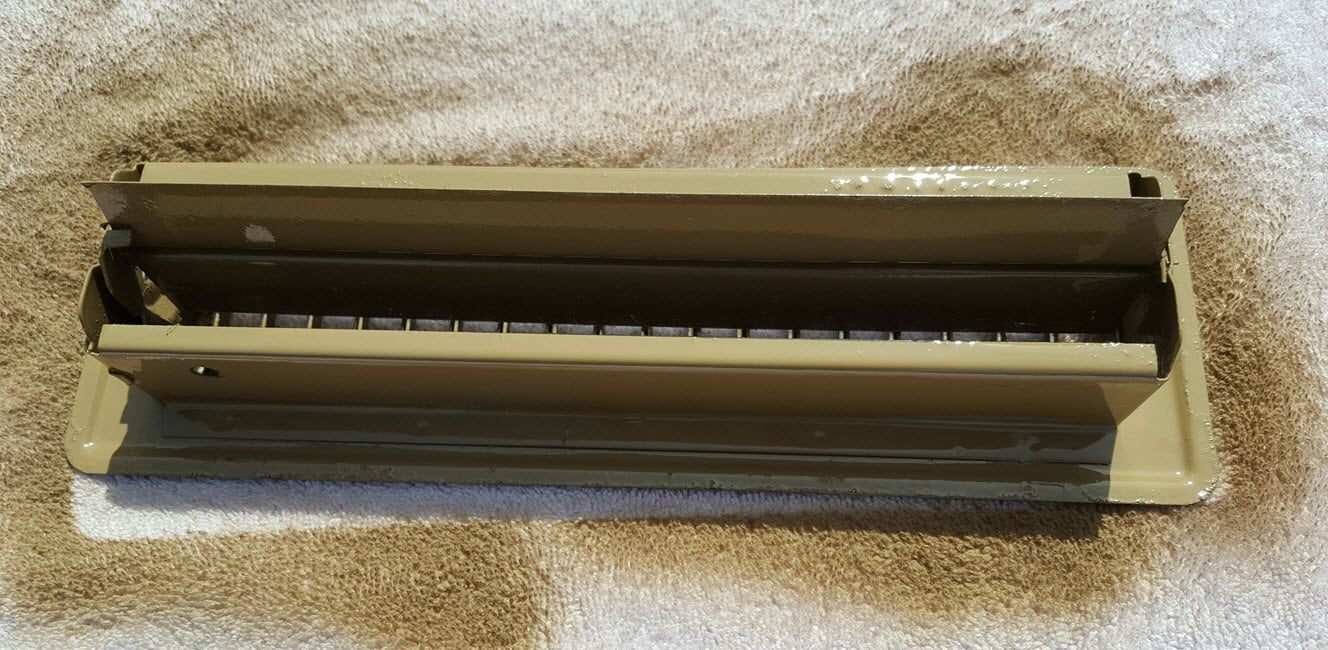
Now, I have kicked up brand new floor vents that are not only super clean but super brand new.

I’m so excited to have new floor vents once again and the fix was super easy and super cheap!

If you have any questions about the process please let me know in the comment section below. I hope you get to transform your floor vents too! We are super happy with the results.

We are a participant in the Amazon Services LLC Associates Program, Viglink, and other Associate Affiliate Programs. Affiliate advertising programs like these provide a means for us to earn fees by linking to these affiliated sites at no cost to you. Thank you for supporting our website.
And as always, thanks so much for stopping by to read How To Easily Transform Old Floor Vents To Brand New. Please subscribe below for the latest updates!


You are so right such a quick and easy fix that give it such a nice new look. Now I’m headed to check out my floor vents. Thanks so much for sharing.
Super quick and excellent before and after on your vents and I love the spray paint idea to make them over like new.
You are so clever. It’s amazing how you zero in on projects that might go unnoticed by others. What a gift. You are truly special. And your project is, too… :-) Susie from Chelsea Project
Great idea but will the paint affect the moving parts?
HI Pat, not at all! Now that mine vents are good and dry, I checked them all and they are perfect! I just went and checked them again and they are all perfect! Thanks so much for stopping by with such an important question!
Carolann
What a quick and easy fix. Thanks for sharing your creativity.
It always amazed me how the simplest things can make such a difference.
Great idea to paint them and they look great.
I love this quick fix… isn’t it amazing what a little paint can do!
What a great improvement to the old vents and they look so nice with a new coat of paint. Gotta love spray paint!
Thanks so much Victoria. It’s amazing what a little spray paint can do! Have a wonderful weekend!
Carolann
Yes exactly! And it’s a difference we love. Thanks much and have a great weekend.
Carolann
Yes Lisa, I am so in love with the idea that this fix was easy and looks amazing. Thanks so much and have a great weekend.
Carolann
Thanks much Denise. I love easy fixes that work perfectly. Have a wonderful weekend!
Carolann
Thanks so much Susie. Your kind words mean so much to me! XO
Thanks so much Sue. It’s amazing how spray paint can make such a difference. Have a wonderful weekend GF!
Thanks so much Anj. This is a easy fix and the results are amazing. Have a wonderful weekend xo
This is a super idea, and I’ve cleaned and painted many of my vents over the years. The spray paint you used is my favorite type for most projectsuccessful, too! If you want to make your vents a little jazzier, you can also use one of the “hammered mwtal” finish spray paints, also by Rustoleum. I like the hammered bronze or copper against my wood woods, but silver or even black would work, depending on the floor color. The hammered texture just gives an extra bit of special gleam to the metal vents. It’s amazing was a difference cleaning and painting such a small item can make!
Excuse the typo’s! I didn’t proofread!…..
Hi Donna, I did look at that hammered metal and seriously thought about getting that. That’s too funny! I think next time I feel like changing them I’m going to try it. Thanks so much for reminding me! And thanks so much for stopping by. Hope to see you again soon.
Carolann xo
lol are you kidding? It’s the story of my life lol. We all make them…no worries
Carolann xo
a very nice post on fixing the old vents. I love the quick fix you did there.
Thanks much Sia. I am so happy with the floor vents now. What a fun project. Thx for stopping over.
Carolann
Its really so easy and quick fix.the spray paint idea is good to make them look like new one.
I will try out the way you explained to see result.
Hi Sandria,
Yes, this works amazingly well! I hope you got to spray paint your vents too! I love how easy it was and how you can choose any color you like. Mine are doing great and I know they will last for years! Thanks so much for stopping by and I hope to see you again soon!
Carolann
Rather than using sandpaper, I prefer the wire brush on my bench grinder. It’s much better at getting into the small spaces. Just be sure to use safety glasses and watch it doesn’t eat you up. It will get rid of a lot of that flaking paint. Great post!
Too late! I just finished replacing all mine, but I do want to spray paint them to match the quarry tile floors.
Hi Dixie, that’s a great idea for sure. I’ll have to try it next time. I love how my new floor vents looks like. Better than new! Thanks so much for stopping by and hope to see you again soon!
Carolann
Hi Dorlis, awww too bad but spraying your quarry tiles floors sounds like an exciting project for sure! I recently spray painted my shower hanging caddy and did a post on it too. I love the way that turned out. There are so many fun projects you can do with spray paint. Thanks so much for stopping by and hope to see you again soon.
Carolann
I’ve been doing this for years! I actually paint them a color that is very close to the paint on the wall and they blend in so well it’s amazing! My bathroom one is a green to match my Iced Celery paint color, and my back bedroom a gray….take a wall paint sample to the store and match it up with the spray paint…they have so many colors now that you will definitely find something close.
Hi Laurie, oh wow! I love that idea too. It’s so awesome to discover new ways to save money and be creative too! Thanks so much for stopping by, and I hope to see you again soon!
Carolann